

advertisement
A successful trip to Rocky Mountain National Park this year requires planning around the timed entry permit system active from late May through mid-October. Visitors must navigate two distinct permit types to book recreation. Go on reservations months in advance, and structure hiking itineraries around early starts to beat both afternoon thunderstorms and trailhead parking that fills before sunrise.
I landed in Denver late on a Friday in July, convinced I’d be on the Bear Lake trail by 8 a.m. the next morning. Chidi here, part of the WakaAbuja team, and I had grossly underestimated the alpine start required at this park. The parking lot was full by 5:30 a.m., and I spent an hour looping the shuttle bus route before I even saw a trailhead. This guide is built from that hard lesson and several subsequent, better-planned trips.
I’ll walk you through the permit system step by step, give you real budget numbers, and segment itineraries by whether you’re hauling toddlers, trail-running solo, or planning a scenic anniversary trip.
Jump to: Timed Entry Permits | Real Trip Budget | Sample Itineraries | Best Hikes | Altitude Protocol | Where to Stay | FAQ
Key takeaways
- Two timed entry permits exist for this year. “Park Access+” covers the entire park, including Bear Lake Road. “Park Access” covers everywhere except Bear Lake Road. Permits go on sale via recreation.gov months ahead.
- Trailhead parking fills before dawn in summer. The Bear Lake lot is often full by 4:30 a.m. on weekends. Plan to arrive at the park entrance before 5:00 a.m. or rely on the shuttle system.
- Afternoon thunderstorms occur almost daily from June through August. Summit your hike and descend below treeline by 1:00 p.m. to avoid lightning exposure. This timing pattern is as reliable as a clock.
- Altitude sickness is real and common. Trail Ridge Road crests above 12,000 feet. Spend at least one night in Denver or Estes Park before any strenuous high-elevation hiking.
- Cell service is effectively zero on most trails. Download offline maps in Gaia GPS or AllTrails before you leave your lodging. The park has extensive dead zones.
How Do Rocky Mountain National Park Timed Entry Permits Work this year?
The timed entry system is the single biggest friction point for planning a trip to Rocky Mountain National Park. The NPS splits the park into two access tiers. I missed this distinction on my first booking attempt and ended up with the wrong permit, locked out of Bear Lake entirely. The frustration was significant. Here is exactly how the system works so you avoid that error.
Park Access + (includes Bear Lake Road): This permit covers the entire park, including the heavily trafficked Bear Lake corridor, Moraine Park, and the trailheads for Emerald Lake, Dream Lake, and Hallett Peak. It is required between 5:00 a.m. and 6:00 p.m. during the permit season, which runs from May 22 through October 12 as of the latest NPS announcement. Park Access (excludes Bear Lake Road): This covers all other areas of the park, including Trail Ridge Road, the Alpine Visitor Center, and trailheads in the Wild Basin area. This permit is also required between 9:00 a.m. and 2:00 p.m.
The booking process happens in two waves on recreation.gov. The first release drops roughly 40% of available permits on a specific date in early May for the entire season. The second release drops the remaining 60% at 7:00 p.m. Mountain Time the night before each entry date. I set a phone alarm for 6:55 p.m. and refresh the page exactly as the clock ticks over. Permits vanish within two to three minutes for peak summer weekend dates.
Create your Recreation.gov account, pre-load your vehicle information, and have a credit card saved to the account beforehand. The reservation costs $2 per vehicle, a nominal processing fee on top of the standard park entrance fee.
@ilariajessica Timed Entry TL;DR 👇🏼 Timed Entry tickets are required for entering Rocky Mountain National Park during certain hours starting on Friday May 22nd, all the way until mid-October. Starting today, May 1st, you can book these timed entry tickets on the recreation.gov app or website. Tickets are released on a monthly basis, so you can only book through the end of June right now, with July tickets becoming available June 1st, and so on. There are TWO different timed entry tickets, so it’s important to know which part of the park you’re wanting to explore. 1. Rocky Mountain National Park Timed Entry (needed between 9am to 2pm): gets you into entire park MINUS Bear Lake Road Corridor 2. Timed Entry + Bear Lake Road (needed between 5am to 6pm): gets you into entire park PLUS Bear Lake Road Corridor My advice? Skip the Timed Entry hassle and just get to the park before 5am or 9am, depending on what area you’re keen to explore. Besides, sunrise hikes in the Park are top tier! 🙂↕️🌄 Additional timed entry reservations will be released on a first-come, first-served basis on Recreation.gov at 7 p.m. MDT on the night before a desired arrival date. I personally wouldn’t rely on this, but it’s always worth a shot! Have questions? Feel free to ask! 🙂 Be sure to save this video, send it to your National Park bestie, and follow along for all the Colorado summer adventures 🤘🏼🏔️
Chidi’s honest take: “Book the park access + permit. Even if you think you’ll explore other areas, the Bear Lake corridor is the heart of RMNP for a reason. The second you skip it, you’ll regret not having access to the most concentrated cluster of iconic alpine lakes in the park.”
What Does a Trip to Rocky Mountain National Park Actually Cost?
No top-ranking page gives a frank budget breakdown. Here is the real money you will spend for a standard four-day trip for two people as of early this year, assuming a summer visit. The park entrance fee is $25 per vehicle for a one-day pass, $35 for a seven-day pass, or free with the $80 America the Beautiful annual interagency pass. Buy the annual pass if this is one of two or more national park trips within 12 months. It pays for itself after three visits.
Camping inside the park runs $35 per night for reservable campgrounds like Moraine Park and Glacier Basin. Estes Park hotels range from $180 to $350 per night in peak summer for a mid-range room within walking distance of downtown. Groceries purchased at Safeway in Estes Park and packed into a cooler save $40 per day compared to restaurant meals. Gas from Denver International Airport to Estes Park and back costs roughly $40 to $60 depending on your vehicle.
A realistic baseline budget for two adults on a four-day trip, including permits, fees, lodging, food, and fuel, sits between $1,100 and $1,600. Splurging on a cabin or guided fly-fishing trip pushes that figure well past $2,000.
What Is the Best Rocky Mountain National Park Itinerary for Your Trip Style?
Fatima, our Lagos-based trip planner, sketched out segmented itineraries based on visitor type after her visit last September. She found the park radically different depending on whether you were willing to wake up at 3:30 a.m. The common thread across every itinerary is an early start. The park rewards morning people and punishes late risers with full lots and thunderstorm scrambles.
Family with Young Kids (3 Days)
- Day 1: Drive Trail Ridge Road. Stop at Many Parks Curve and the Alpine Visitor Center. Short, paved walk at the Tundra Communities Trail. Picnic at Hidden Valley.
- Day 2: Bear Lake loop (0.6 miles, flat, wheelchair accessible). Continue to Nymph Lake. Nap back in Estes Park. Afternoon ranger program at the Moraine Park Discovery Center.
- Day 3: Wildlife drive through Horseshoe Park at dawn for elk. Sprague Lake easy loop (0.5 miles). Ice cream in downtown Estes Park.
Avid Hiker (4 Days)
- Day 1: Acclimatization. Short hike to Gem Lake near Estes Park. Hydrate aggressively.
- Day 2: Bear Lake trailhead by 4:30 a.m. Emerald Lake, Dream Lake, and Lake Haiyaha loop. 5+ miles, moderate.
- Day 3: Sky Pond via the Glacier Gorge trailhead. 9 miles, strenuous. Timberline Falls scramble requires good shoes.
- Day 4: Chasm Lake or Flattop Mountain for a high-alpine finish. Start at 3:00 a.m. to catch sunrise above treeline.
Which Hikes Should You Prioritize in Rocky Mountain National Park?
I have hiked most of the named trails on the east side of the park across three separate trips. These four hikes deliver the highest scenic payoff relative to effort, and I recommend them over chasing obscure backcountry routes unless you specifically want solitude over views.
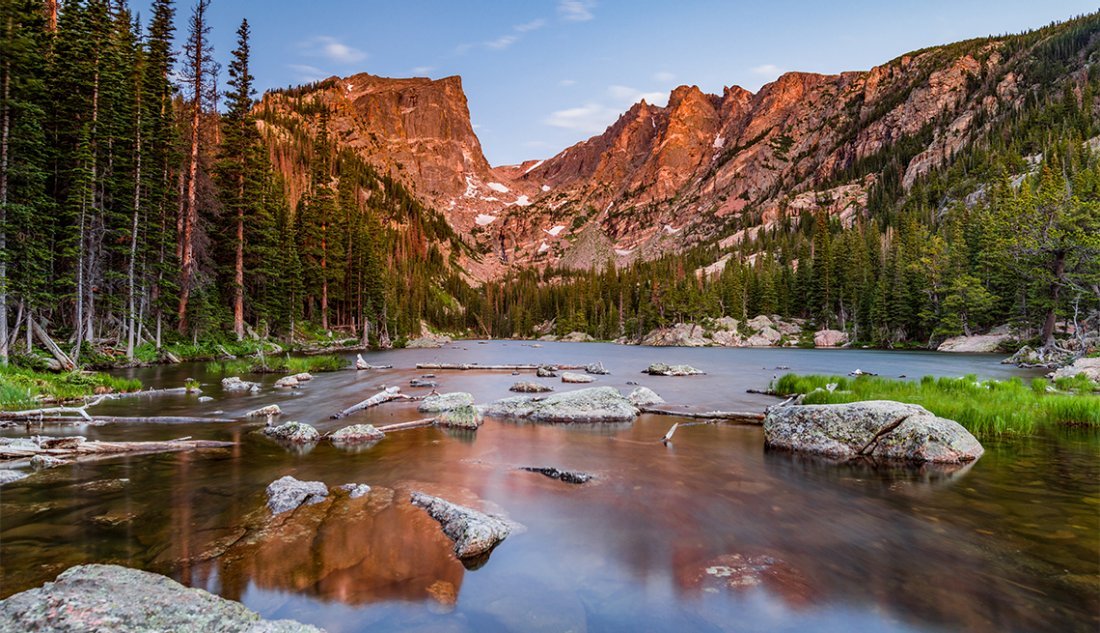
Emerald Lake (3.6 miles round-trip, moderate). This is the best bang-for-effort hike in the park. You pass Nymph Lake and Dream Lake on the way to a startling green alpine lake tucked beneath Hallett Peak. The trail is well-maintained and crowded, but the view at the end justifies every step. Go at sunrise for reflected alpenglow on the water. Sky Pond (9.0 miles round-trip, strenuous). This hike filters out casual tourists at Timberline Falls, where you scramble up a steep, wet rock face next to a waterfall. Above the scramble, the Lake of Glass and Sky Pond sit in a glacially carved amphitheater that feels like a secret world. Chasm Lake (8.4 miles round-trip, strenuous). The trail peels off from the Longs Peak trailhead and delivers you to an alpine lake at the base of the diamond face. The final section crosses a boulder field that holds snow well into July. Trekking poles help enormously here.
Deer Mountain (6.0 miles round-trip, moderate). This is the best summit hike that does not require a Bear Lake Road permit. The trail climbs steadily through pine forest before opening onto a broad summit with a 360-degree panorama of the Continental Divide. I hiked it on a day when I could not secure a Bear Lake corridor permit, and it salvaged the entire trip.
How Do You Prevent Altitude Sickness in Rocky Mountain National Park?
Estes Park sits at 7,522 feet. Trail Ridge Road crosses 12,183 feet. The oxygen pressure at that elevation is roughly 40% lower than sea level. Altitude sickness hits indiscriminately, regardless of fitness level. I watched a marathon runner from Chicago collapse with a pounding headache at the Alpine Visitor Center while a sedentary retiree from Santa Fe strolled around comfortably. Prior acclimatization is the only reliable predictor.
The protocol Fatima and I now follow is strict. Spend the first night in Denver at 5,280 feet. Do not drive straight from the airport to a high-elevation trailhead. On Day 2, move to Estes Park and hike nothing above 9,000 feet. Drink 100 ounces of water minimum. Avoid alcohol entirely for the first 48 hours. Ibuprofen taken prophylactically at the trailhead has been shown in some studies to reduce acute mountain sickness symptoms, though it is not a substitute for proper acclimatization. If you develop a persistent, worsening headache, nausea, or dizziness, descend immediately. The only cure for altitude sickness is lower elevation. The park’s lower trails, like the Lily Mountain hike or the first section of the Cub Lake trail, work well as acclimatization hikes.
Fatima’s honest take: “I ignored the hydration advice on my first day and had to turn around 1.5 miles into a hike. A splitting headache made every step feel like wading through syrup. The next day, after a gallon of water and a full night’s sleep, the same trail felt entirely different. Take the acclimatization day seriously.”
What Do You Do When It Rains in Rocky Mountain National Park?
Thunderstorms roll in between 1:00 p.m. and 3:00 p.m. nearly every afternoon from June through early September. This is not a maybe situation. The schedule is reliable enough to plan around. When the lightning starts, you need to be below treeline or inside a vehicle. The Alpine Visitor Center sits at 11,796 feet on Trail Ridge Road and makes a perfectly timed rainy-day stop. The exhibits cover alpine ecology, and the large windows let you watch storms sweep across the tundra.
Driving Old Fall River Road during rain works well. The nine-mile one-way dirt road winds slowly through forest and past waterfalls. You stay inside the car and still feel immersed in the park. In Estes Park, the Rocky Mountain Conservancy nature store near the Beaver Meadows entrance sells excellent topo maps and local field guides. The Kind Coffee Shop on Elkhorn Avenue has reliable WiFi and a covered porch where I have waited out more than one storm with a latte and a trail map spread across the table. Check the NPS trail conditions page for mud closures after heavy rain.
@devenr3 On rainy days, Rocky Mountain National Park has a fraction of the tourists than usual 🙌🏻 I went to 4 lakes yesterday and I was the only soul at each lake when I got there. Such a surreal moment when you have the lakes to yourself. I passed maybe 6 different people total on this 11 mile adventure but never shared the views with anyone 🤩 Was so excited to be able to use my newly thrifted vintage rain jacket, brand is Ms. Puddles. I love the fit, color and length…literally perfection 🙌🏻 I brought several layers but never broke out my fleece. It was chilly but the steep elevation gains had my body temp on high lol rained on and off but never a downpour. I had such a blast 🥾 #fypシ #hiking #outfit #mountain #creatorsearchinsights
Where Should You Stay on a Trip to Rocky Mountain National Park?
Estes Park is the eastern gateway and the most practical base for 90% of visitors. The town stretches along the Big Thompson River and offers everything from budget motels to riverside cabins. I have stayed at the Silver Moon Inn twice because it sits within walking distance of downtown restaurants and the river walk, and the morning coffee run to Inkling & The Bean takes four minutes on foot. Grand Lake on the western side offers a quieter, less crowded entry point with direct access to the Kawuneeche Valley and the Colorado River headwaters. It works well for visitors combining RMNP with a broader Colorado road trip.
Inside the park, Moraine Park Campground and Glacier Basin Campground are the best-located tent sites. Reservations open on recreation.gov six months in advance and fill completely within hours for summer dates. I failed to secure a spot three years running and now book a backup hotel on Booking.com the same day I try for a campsite reservation. For cabin rentals and larger groups, Vrbo listings clustered around Fall River Road offer excellent proximity to the park’s Fall River entrance, which tends to have shorter entry lines than the main Beaver Meadows gate.
Grocery shopping in Estes Park is straightforward. The Safeway on East Elkhorn Avenue has a full deli, fresh produce, and camping fuel canisters. Stock up here rather than paying convenience store markups at smaller shops closer to the park entrances.
Where Are the Best Sunrise and Wildlife Photography Spots?
Moraine Park at dawn delivers the most reliable wildlife photography in the park. Elk herds graze the meadow grass in golden light with Longs Peak rising behind them. I have photographed bull elk with full racks here in late September, the rutting calls echoing across the valley. Arrive at 5:30 a.m. and set up near the Big Thompson River crossing. A 70-200mm lens works well. A 100-400 mm is better.
Bear Lake at sunrise, photographed from the northeast shoreline, catches Hallett Peak reflecting in still water. The light hits the peak roughly 20 minutes after official sunrise time. Tripods are allowed on the paved path. Sprague Lake offers an easier-access alternative with wheelchair-accessible platforms and similar reflection potential. For astrophotography, the Trail Ridge Road pullouts above 11,000 feet sit above significant light pollution. The Milky Way arc is clearly visible from late May through early September on moonless nights. Check the lunar calendar before booking your trip dates if night sky images are a priority.
What Are the Most Common Mistakes People Make on a Trip to RMNP?
- Booking the wrong timed entry permit. The Bear Lake Road corridor is excluded from the standard “Park Access” permit. I made this mistake once and had to completely restructure two days of hiking. Confirm you have “Park Access +” if Bear Lake, Glacier Gorge, or Moraine Park are on your list.
- Starting hikes after 8:00 a.m. in summer. This guarantees full parking lots and exposure to lightning above treeline. The alpine start is not optional. It is the defining rhythm of a successful RMNP trip.
- Ignoring hydration on Day 1. The dry mountain air accelerates dehydration far faster than sea-level humidity. Combine that with altitude, and headaches become almost guaranteed. Pre-hydrate heavily the night before and morning of every hike.
- Relying on cell service for navigation. There are extensive dead zones throughout the park. The entire Bear Lake corridor has no reliable signal. Download offline maps in apps like Gaia GPS before you leave your lodging.
- Approaching wildlife for photos. Park regulations require a minimum of 25 yards from elk and 50 yards from moose and bears. Every year, visitors are gored or trampled, ignoring this rule. A long lens is cheaper than a hospital bill.
- Skipping rain gear because the morning is sunny. The afternoon storm pattern is relentless. Pack a lightweight rain shell and a dry bag for electronics even if the forecast looks clear. Hypothermia risk is real above treeline in sudden temperature drops.
Frequently asked questions
Do I need a timed entry permit if I enter before 5:00 a.m.?
No. The Park Access + permit (Bear Lake Road) is required between 5:00 a.m. and 6:00 p.m. Entering before 5:00 a.m. is a common workaround used by hikers targeting Longs Peak or Chasm Lake. You must be past the entry gate before the permit window activates.
How many days do you need in Rocky Mountain National Park?
Three full days allows you to drive Trail Ridge Road, explore the Bear Lake corridor, and tackle one major hike like Sky Pond or Chasm Lake. Four to five days opens up the Wild Basin area and allows for a rest day or a second attempt at a weather-dependent summit. Two days feels rushed unless you are a local returning for a specific objective.
Is Trail Ridge Road open year-round?
No. Trail Ridge Road typically opens fully by Memorial Day weekend (late May) and closes for the winter by mid-October, depending on snowfall. The exact opening date varies annually. Check the NPS website’s road status page for current conditions before your drive.
What is the best month to visit Rocky Mountain National Park?
Late June through early September offers full wildflower blooms, open alpine trails, and stable weather patterns, though crowds peak during this window. Mid-September delivers fewer crowds, active elk rutting, and golden aspen foliage, but Trail Ridge Road can close temporarily if early snow arrives.
Can you hike in RMNP without a car?
The park’s shuttle bus system operates along Bear Lake Road and connects to Estes Park during peak season. You can access the Bear Lake corridor, Moraine Park, and the park-and-ride lots without a personal vehicle. Reaching more remote trailheads like Longs Peak or Wild Basin still requires a car or a private shuttle service.
Are dogs allowed on the trails in Rocky Mountain National Park?
Dogs are prohibited on all trails, in the backcountry, and in meadows. They are permitted only in parking lots, campgrounds, and along paved roads while leashed. This is one of the most restrictive pet policies of any national park. Do not plan to hike with your dog here.
Plan your trip: booking platforms we trust
The WakaAbuja team uses these platforms regularly because their search filters help narrow down the specifics that matter for a national park trip: flexible cancellation, early check-in for alpine starts, and proximity to trailheads.
Vrbo — Our top pick for cabin rentals along Fall River Road, perfect for families and groups.
GetYourGuide — Useful for booking guided snowshoe tours in winter and fly-fishing excursions.
Kayak — Reliable for comparing Denver International Airport flight prices and rental car rates.
TripAdvisor — Helpful for reading recent reviews on Estes Park restaurants and ranger program feedback.